This post contains affiliate links. If you use these links to buy something we may earn a commission.
So my wife came to me one day with a pallet and a task. Her requests are sometimes daunting, but this one ended up being pretty easy and rather functional. This post will give you the simple steps needed to make a Vertical Pallet Garden and also some Vertical Pallet Garden Ideas on functionality and positioning.
Items Needed
- Wooden Pallet – This can be used and you normally can get one free from your local hardware store. My wife asked a team member at our local Home Depot and he said she could take what she could carry. That was a fair warning as they are rather heavy and you do want one that is intact and has a minimum of 3 slats that you can hang plants from.
- Sand Paper – You don’t need to worry about getting a sander or a bunch of sandpaper, but if you have some around bust it out for this task. Used pallets are often nicked, dinged and dingy. Having sandpaper around can be helpful to tidy them up and keep you from getting cuts and splinters, prior to panting.
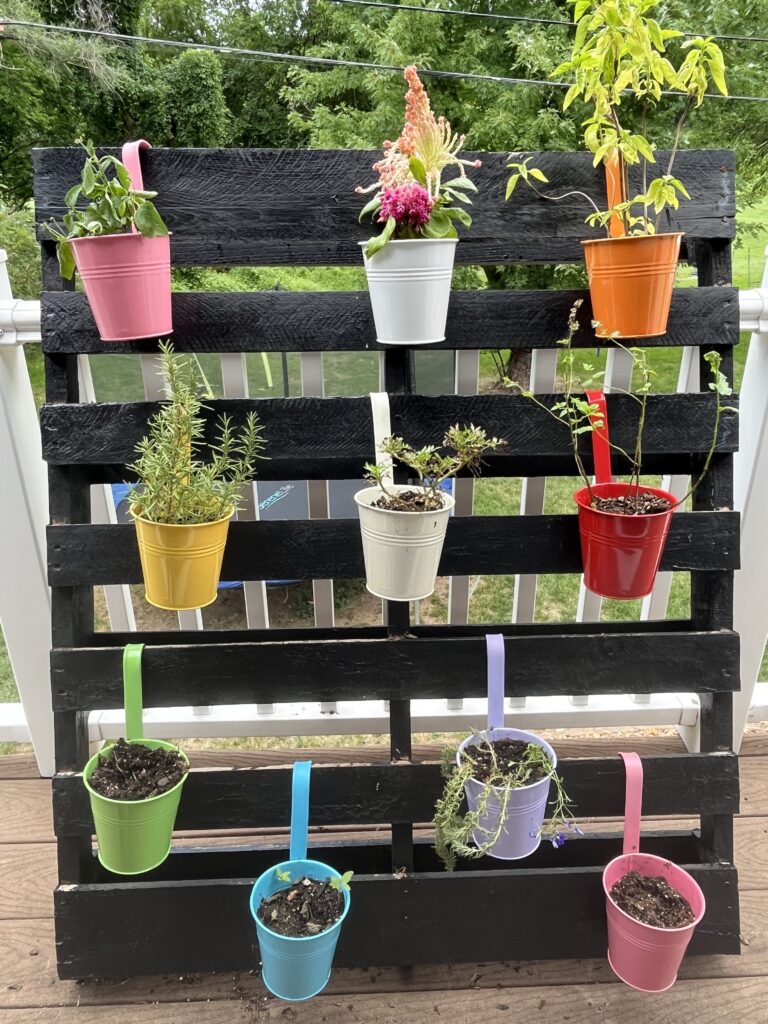
- Paint or Stain – We painted ours black using an outdoor oil based paint because… well that is what we had in the basement. You want to plan better and consider what will fit your style. Think about the colors you will use for the pallet and coordinate with the style you will select for the hanging planters. Note that you want this to be functional all year round and you may move it around your house/yard, so consider a versatile color combo.
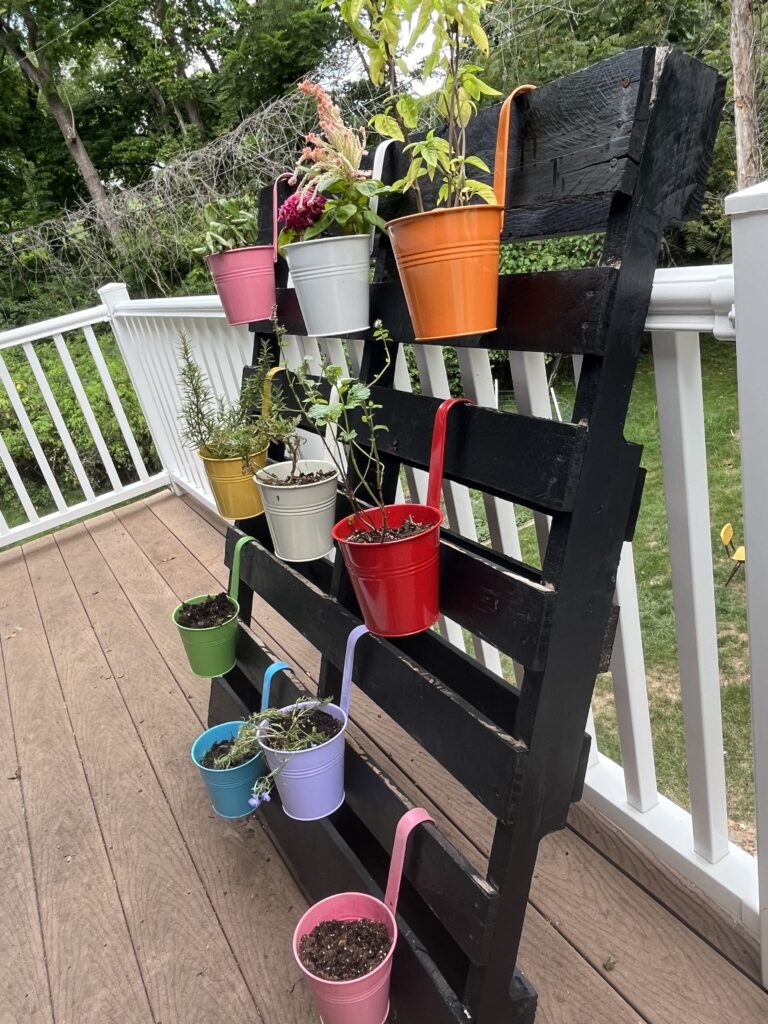
- Hanging Planters – You will need multi-color pots as pictured below. You can get whatever fits with your design. Amazon has a 10 count version that is often on sale for less then $20 (affiliate link). The key is getting what you like and making sure they have a hook that can hang from a board.

Steps to Assemble
This is pretty simple. There are only a few steps as your pallet is already assembled as needed.
- Sand and clean the pallet to remove jagged edges and clean the pallet prior to painting.
- Paint or stain the pallet to the color you desire. You may want multiple coats, as this will be in the elements and you will want something that lasts.
- Assemble your hanging planters so they have the arms attached to the pot.
- Position this in the location you desire and begin filling the planters with planting soil and the arrangement you desire. We will provide a few ideas below, but use your designs and desires and try what fits for your home or garden.
Vertical Pallet Garden Ideas
Spring – Consider some early blooming flowers and hearty herbs that can last you through the summer. We have used mint, thyme and basil with some flowers that bloom in the spring. In the summer, we will keep the herbs assuming they are still in good condition. We put our spring time Vertical Pallet Garden in front of our house and transition it to our back deck for the summer.
Summer – We add to the spring herbs that we already have in the planters. We replace some of the Spring flowers with some additional herbs like cilantro. We also move the Pallet to our deck so that we can access these easier from our kitchen. The hanging planters then face our screened in porch, so you still get to view the garden in this location.
Fall – Moving the pallet back out front for the fall. Mums take over at this time. We may keep some of the heartier herbs to use in fall cooking, but everything that has browned from the summer heat we replace with mums.
Winter – After we transition out the mums, we use this season to put in some fake pine trees. This can also be incorporated into your holiday lights, making the Vertical Pallet Garden a year round amenity.

I hope you like our Vertical Pallet Garden Ideas. This is a very easy and cheap DIY. Make this your own and drop us a line letting us know what ideas you come up with!
